Navigate to the side menu on the left of the page and select Reports.
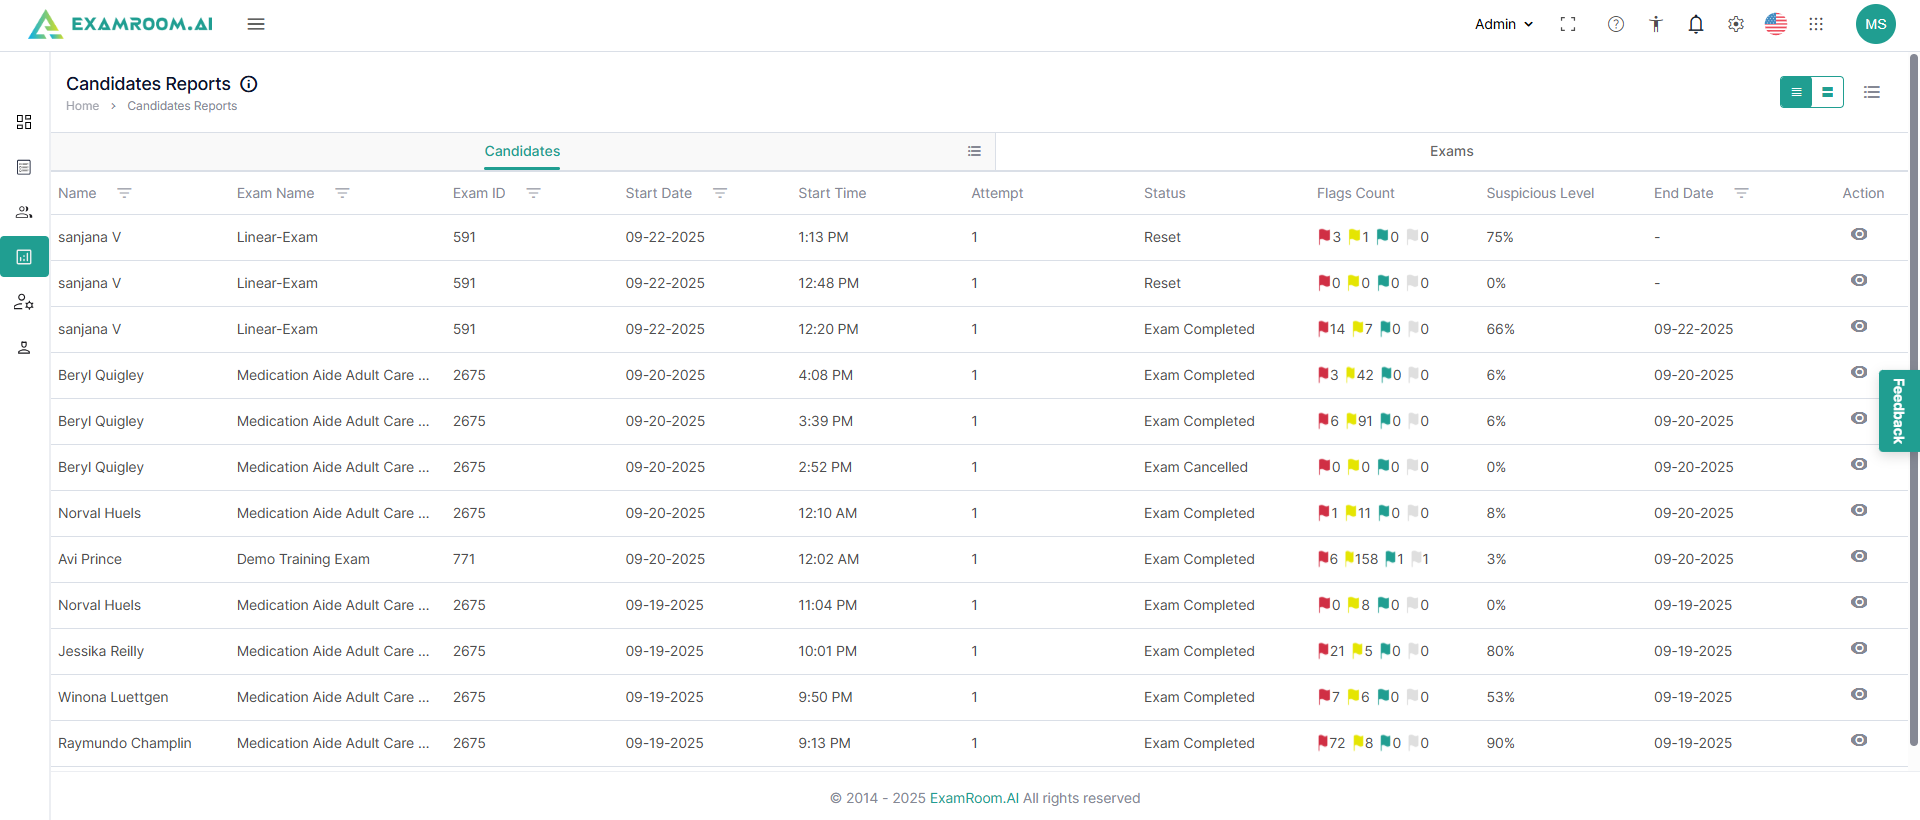
The reports are further classified into Candidate and Exams. This screen can be customized to focus on any one of these sections by deselecting Candidates or Exams from the custom display.
You can utilize CustomizeDisplay to view the required information columns under candidate reports.
The reports based on the candidate have the following details:
Name: Name of the candidate
ExamName: Name of the exam
ExamID: The unique ID of the exam
StartDate: Date of attempt of exam by the candidate
StartTime: Time when candidate started the exam
Attempt: Number of attempts availed by the candidate
Status: Current status of the exam for the particular candidate
FlagsCount: Flags raised for the candidate during the examination
SuspiciousLevel: Detected suspicion level by the system based on activities and behavior of the candidate during the exam.
EndDate: Date of completion of exam by the candidate
Action: Available actions on the candidate report
View: Click the view icon for a particular candidate for a detailed view
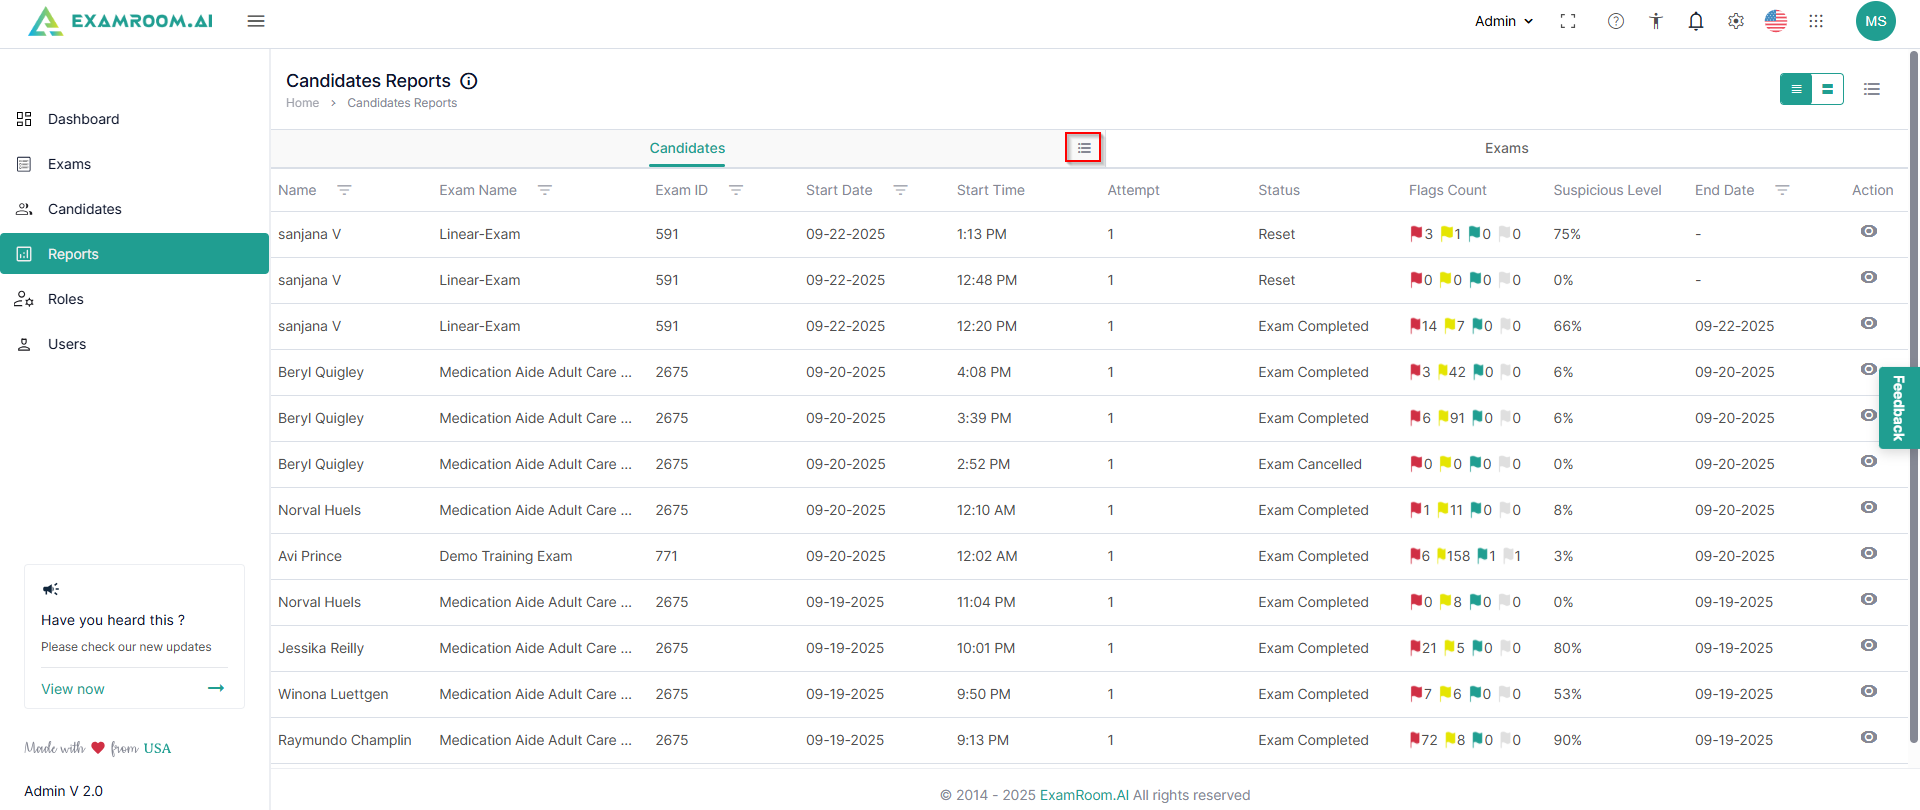
You can customize the columns to view the candidate reports.
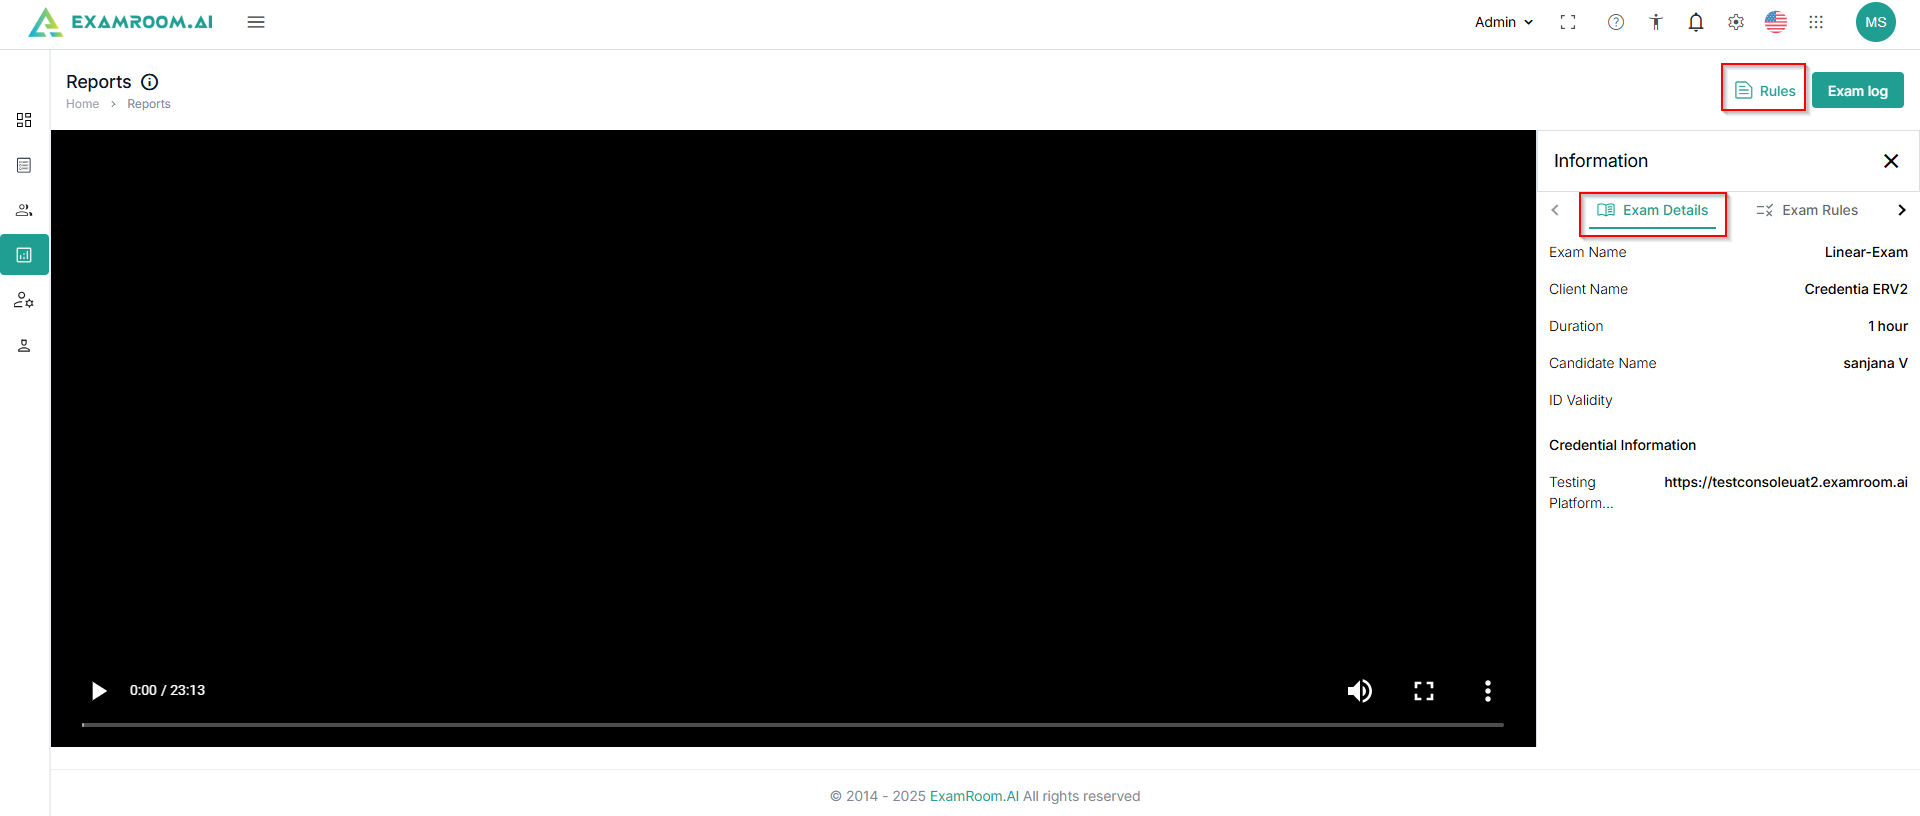
The detailed view of the candidate report has chapter-wise video clips on the right-side bar on the screen for each major activity done during the exam.
Select and play the video to see the recorded feed of the candidate during the examination.
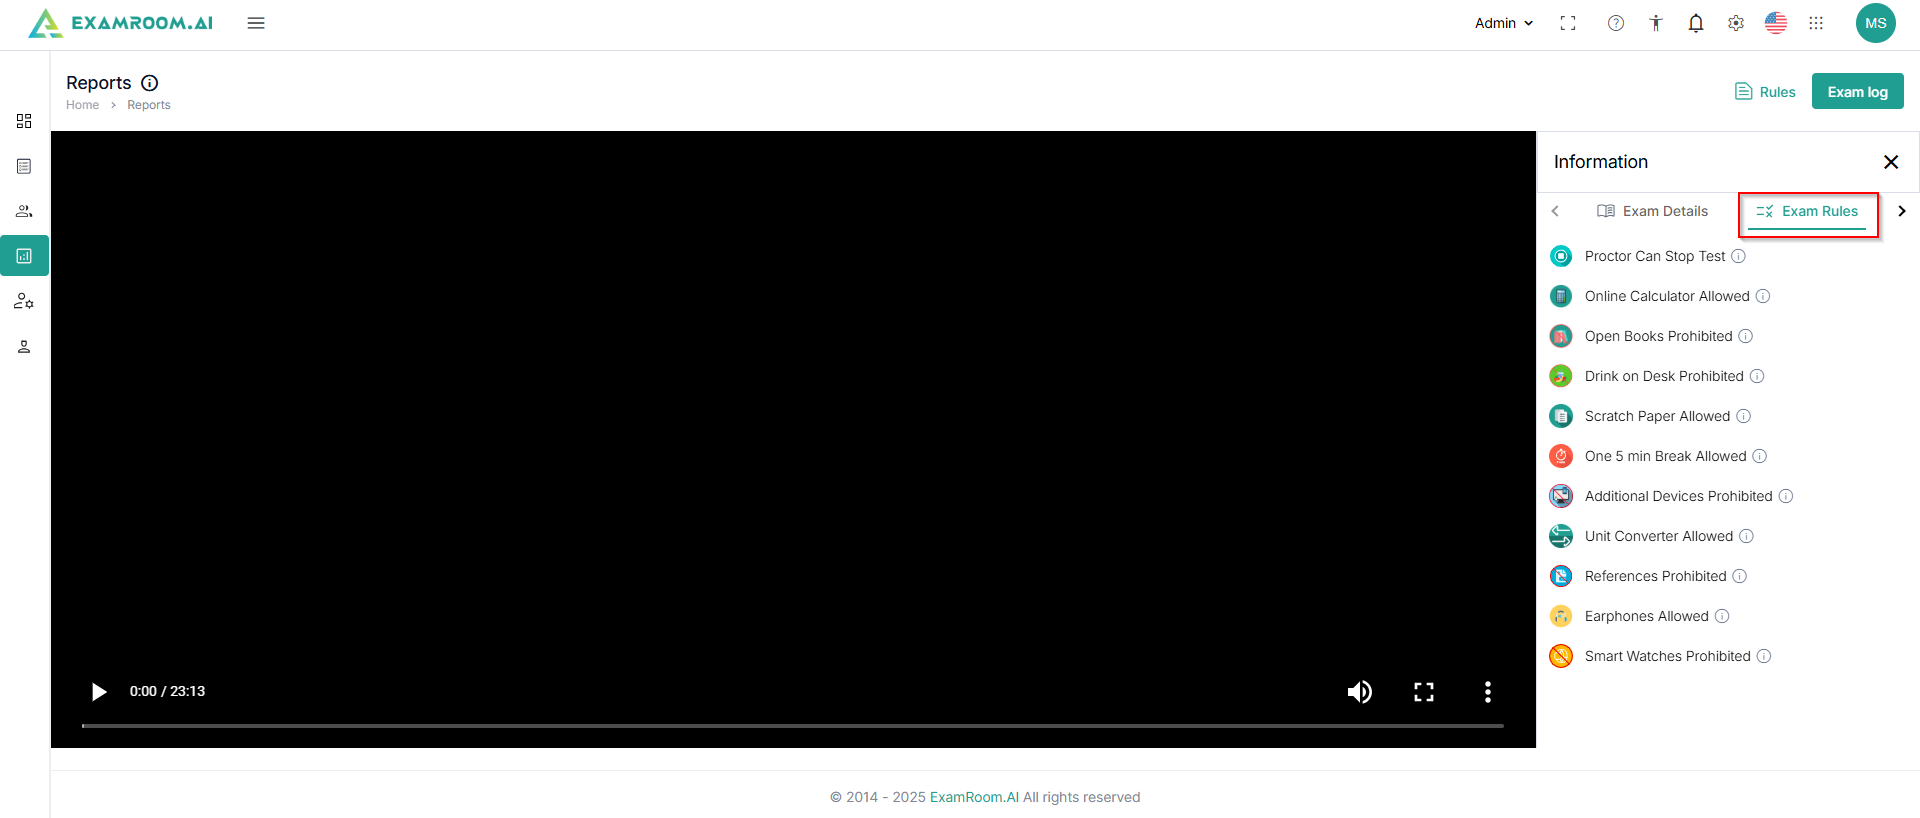
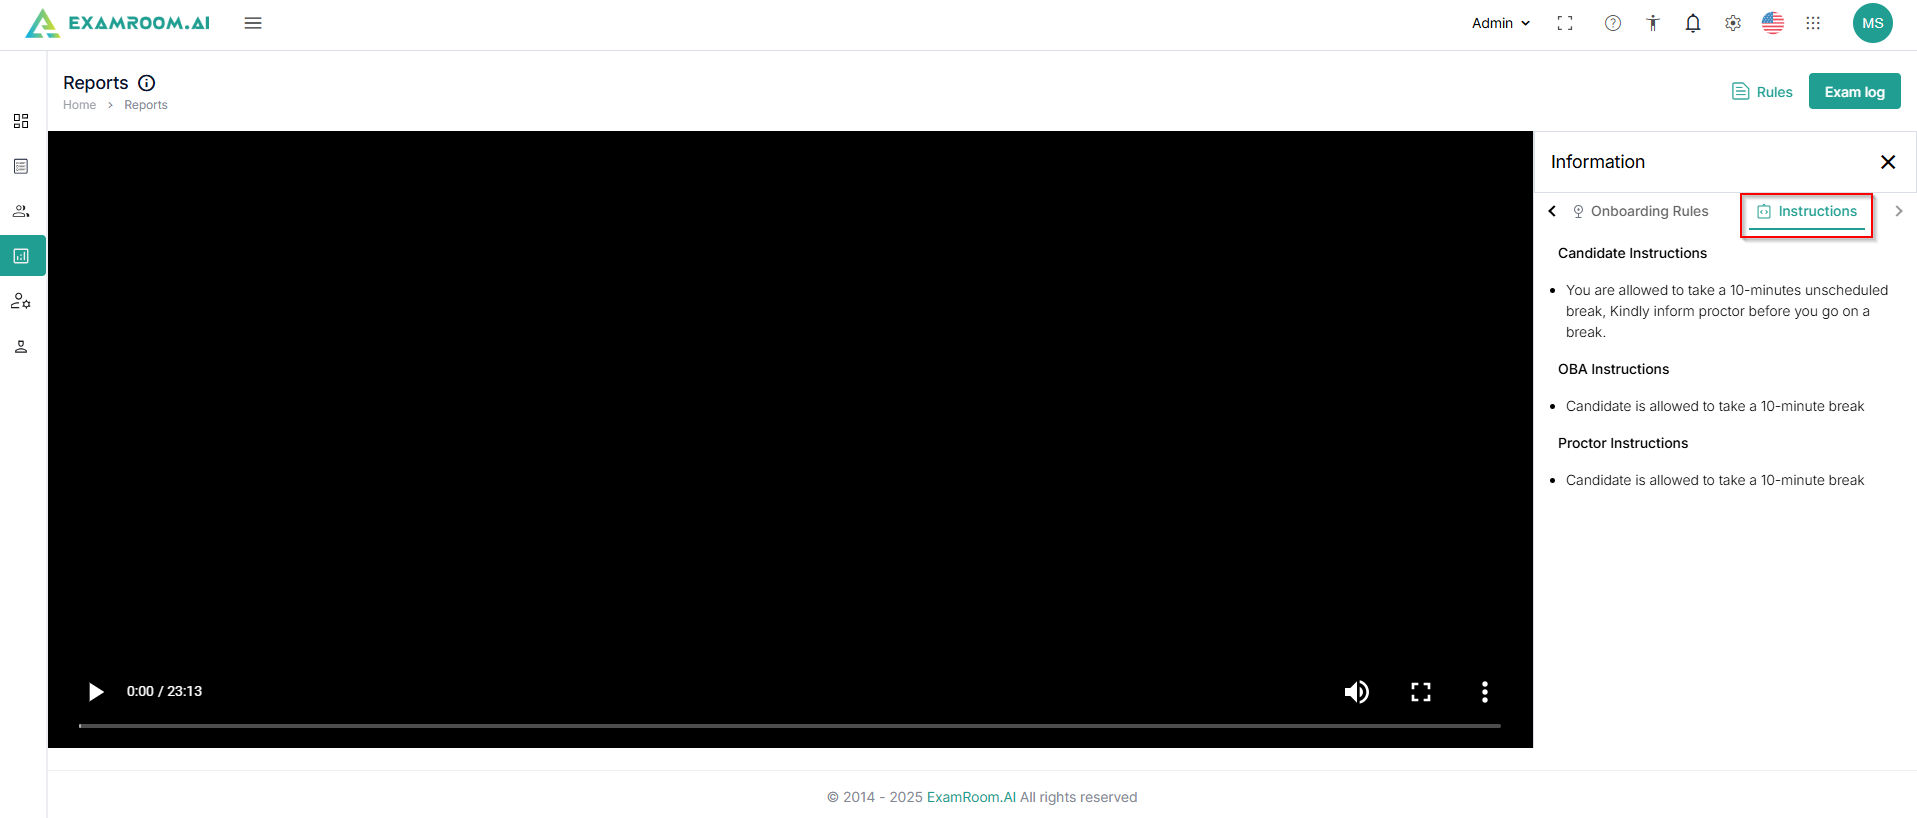
Click Rules to explore the rules of the examination. It includes Exam Details, Exam Rules, and Instructions.
Navigate to the ExamRules section to check the rules for the examination.
Check the OnboardingRules to review the rules applied during the onboarding process.
Navigate and check the Instructions given to the candidates for the examination.
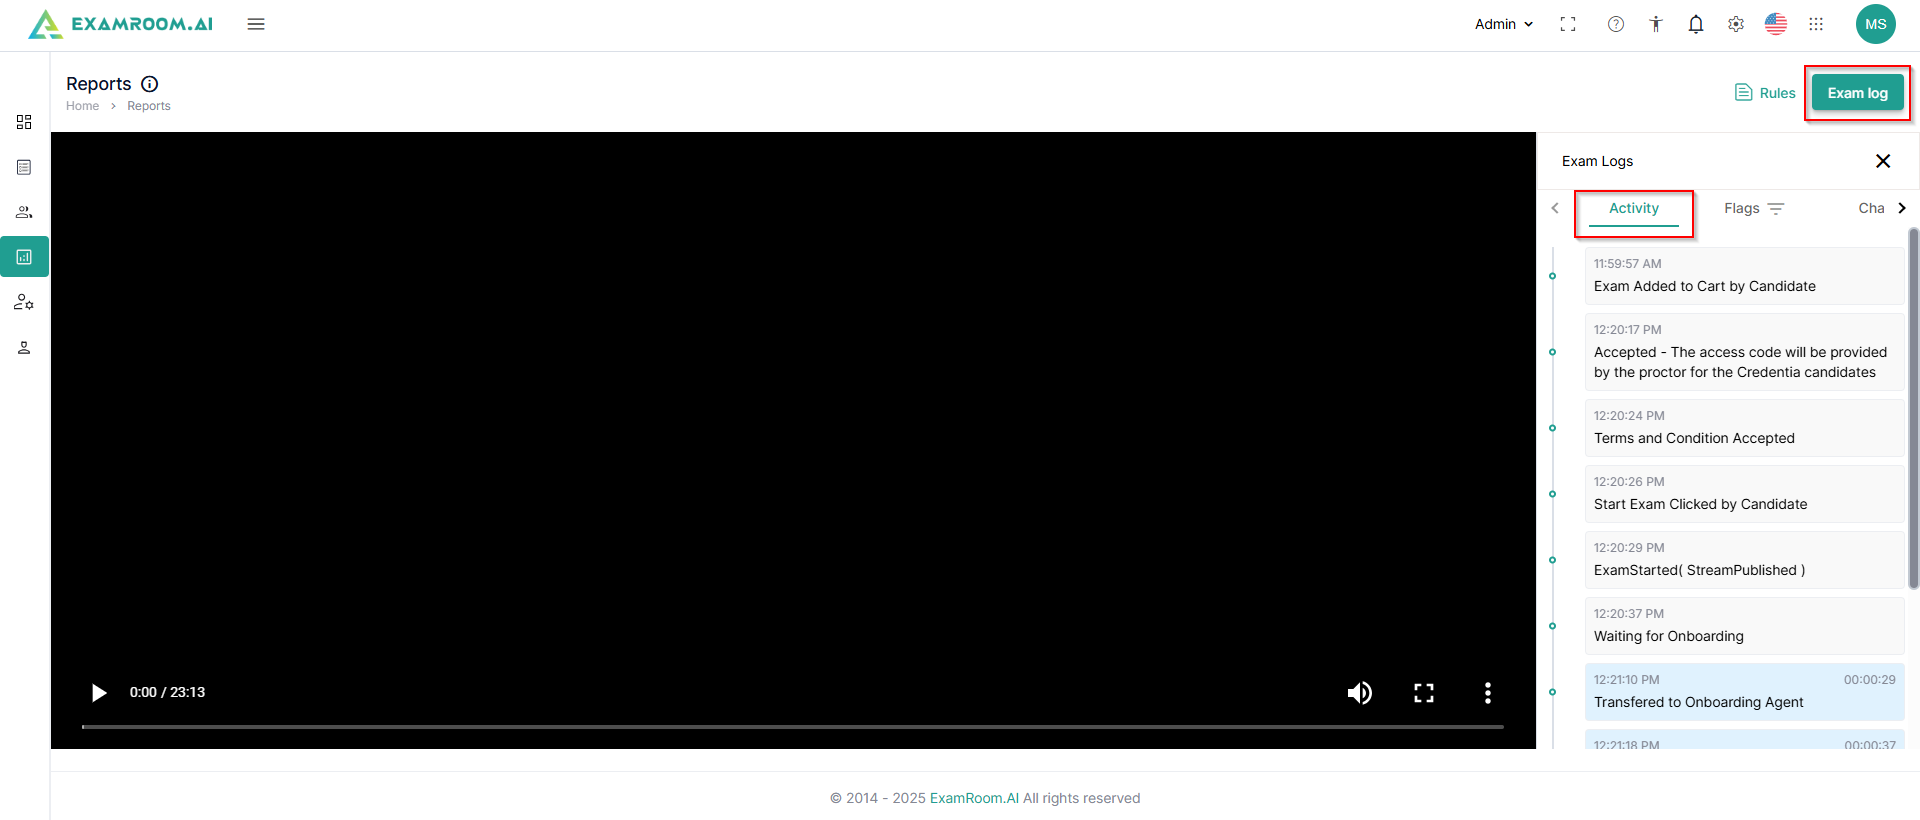
Click ExamLog to view the candidate's activity timeline during the exam.
Click Flags to check the raised flags during the examination. Select the type of flag raised from the options of flags raised by AI, flags raised by OBA, and flags raised by the Proctor. Further select the color of flags raised to refine your search. You can also filter the flags by role and flag type to get accurate and desired results.
Click the picture icon against the flag information to view the screenshot captured while raising the flag. If the proctor has validated the AI-raised flags, validation and comments information will be available here.
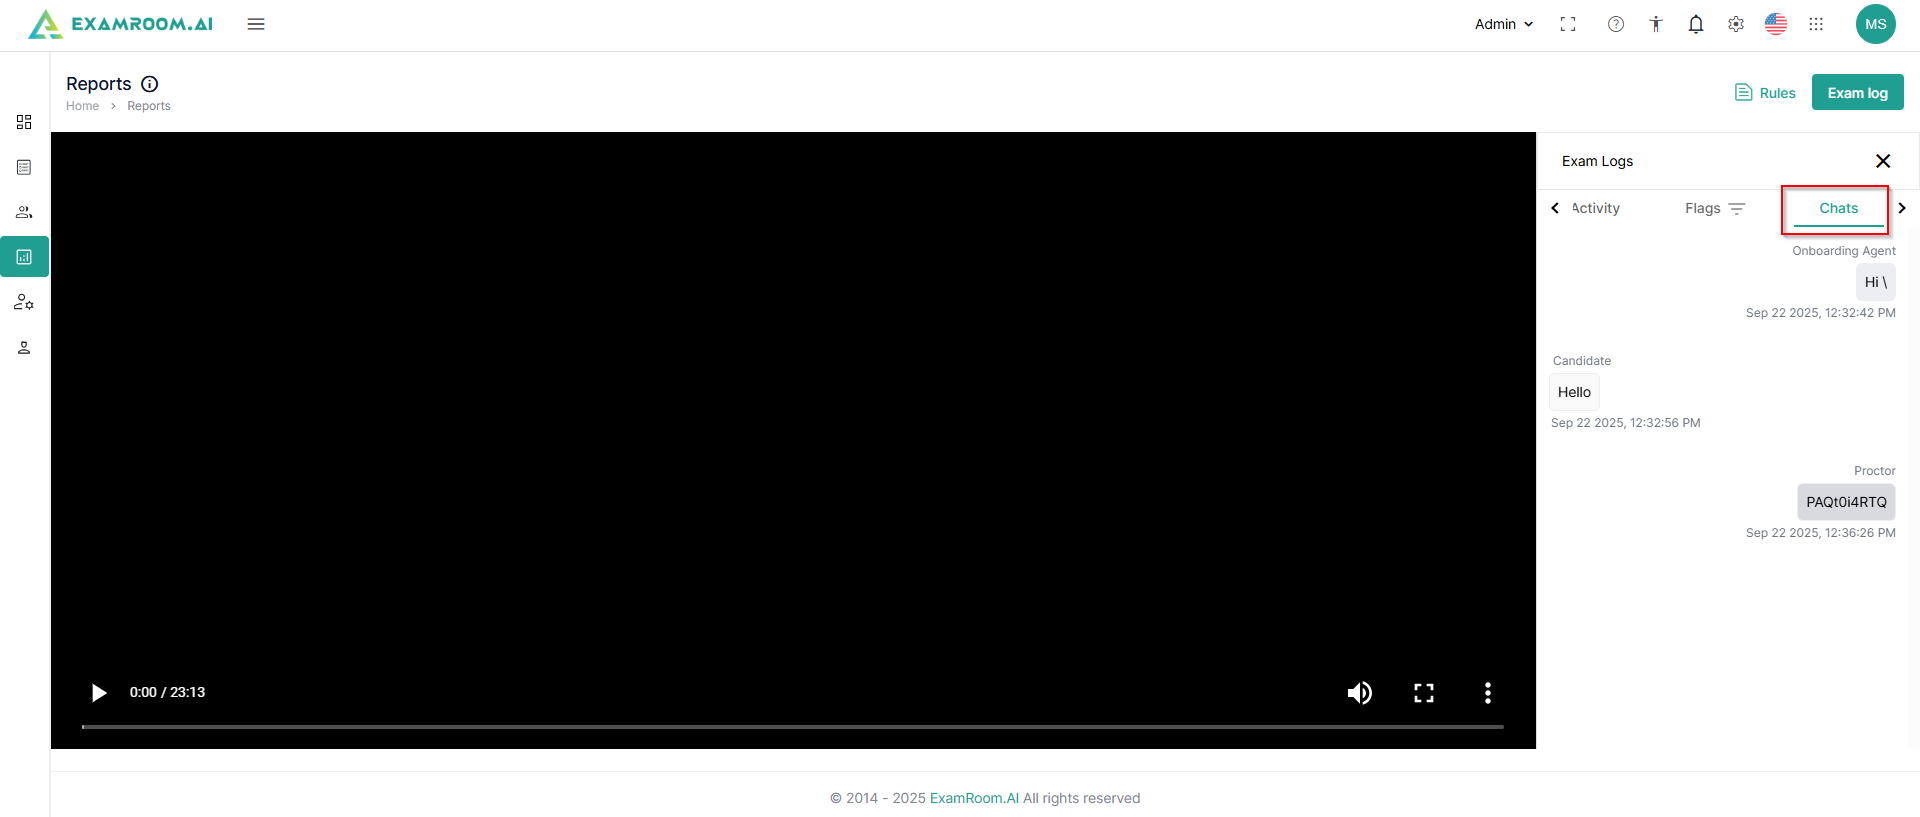
Click Chats to access the candidate chat with the agents (OBA/Proctor).
Click Screenshots to view the captured screenshots during the exam session.
Click Notes to check the created notes during the onboarding and proctoring.
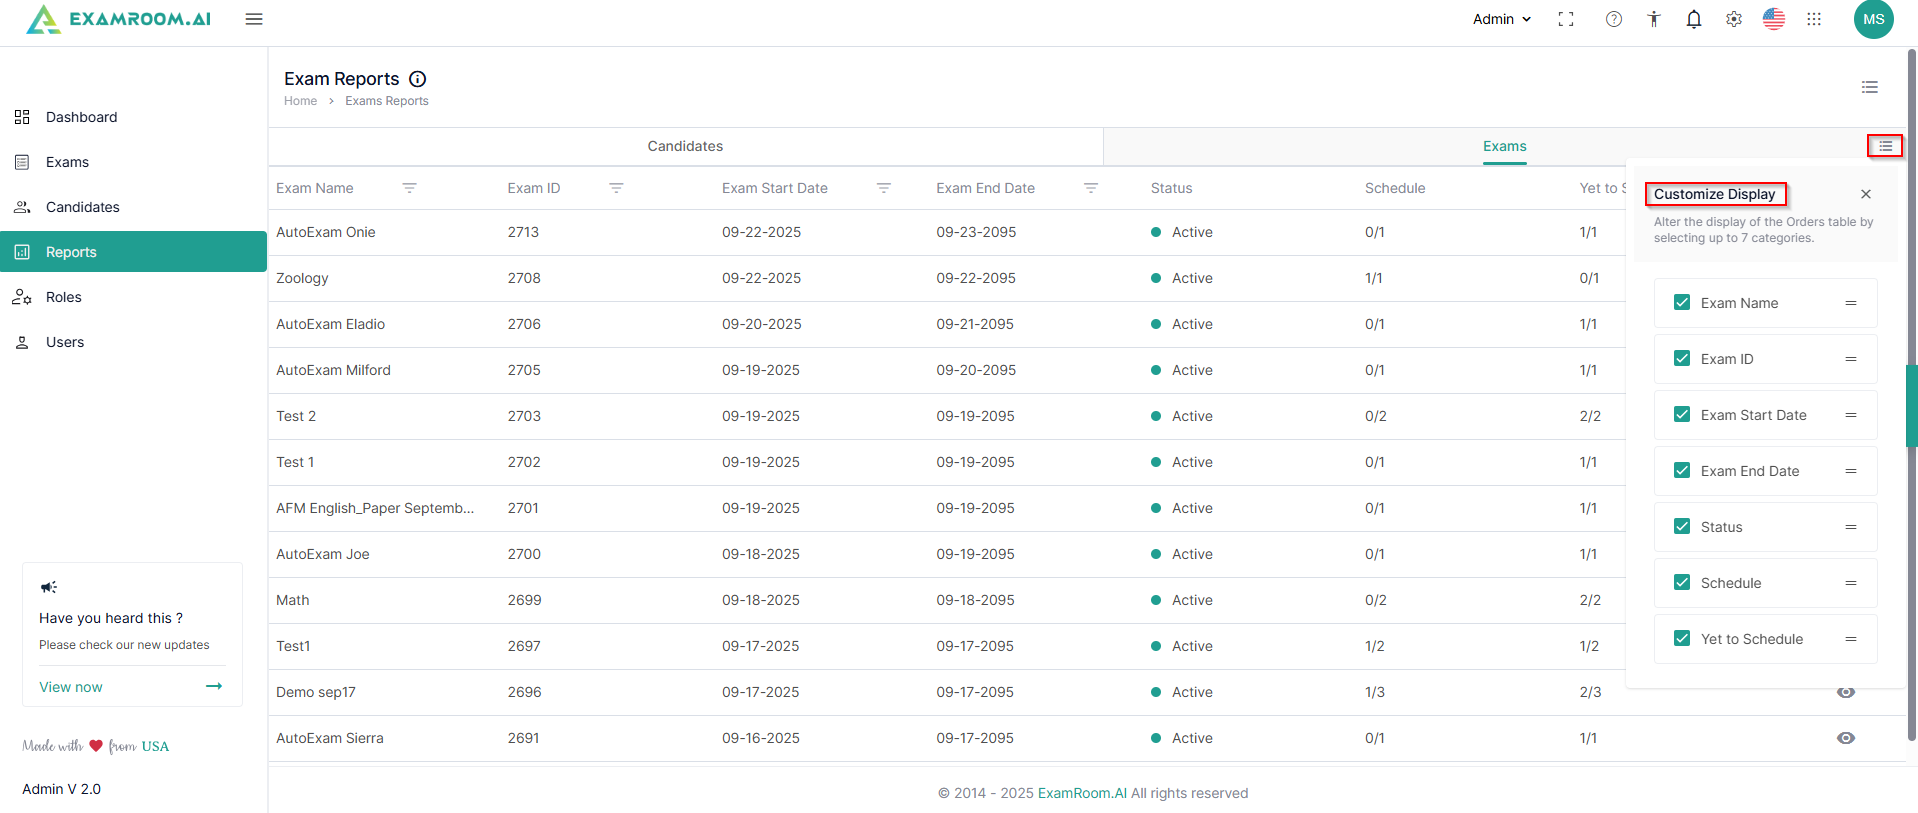
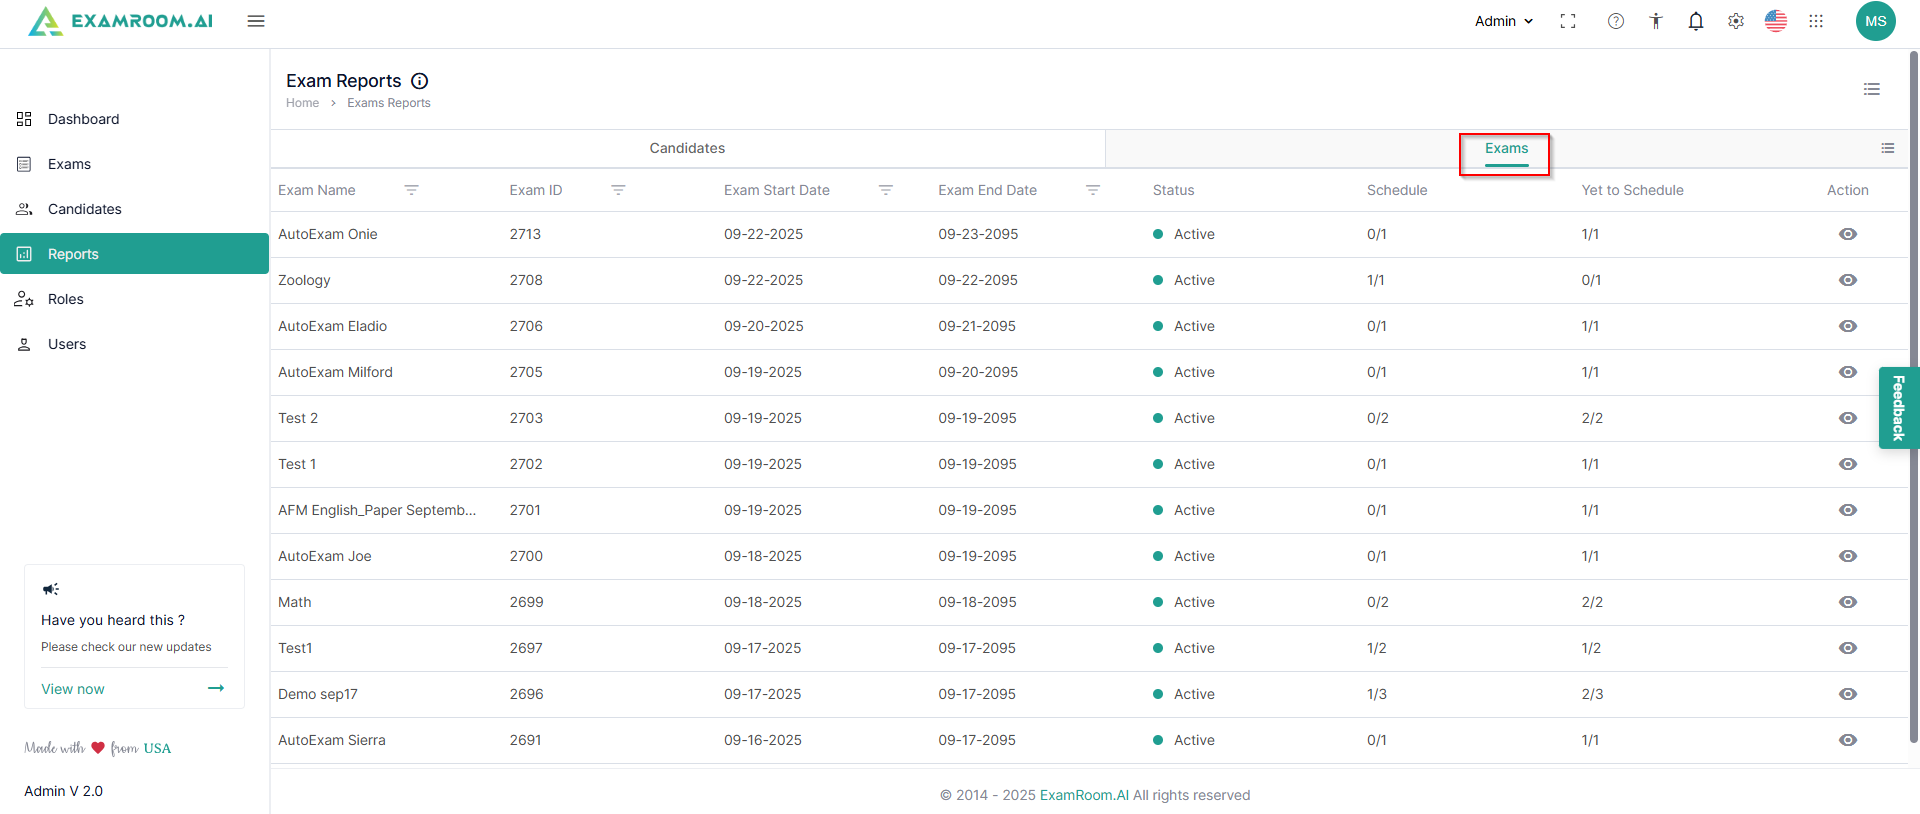
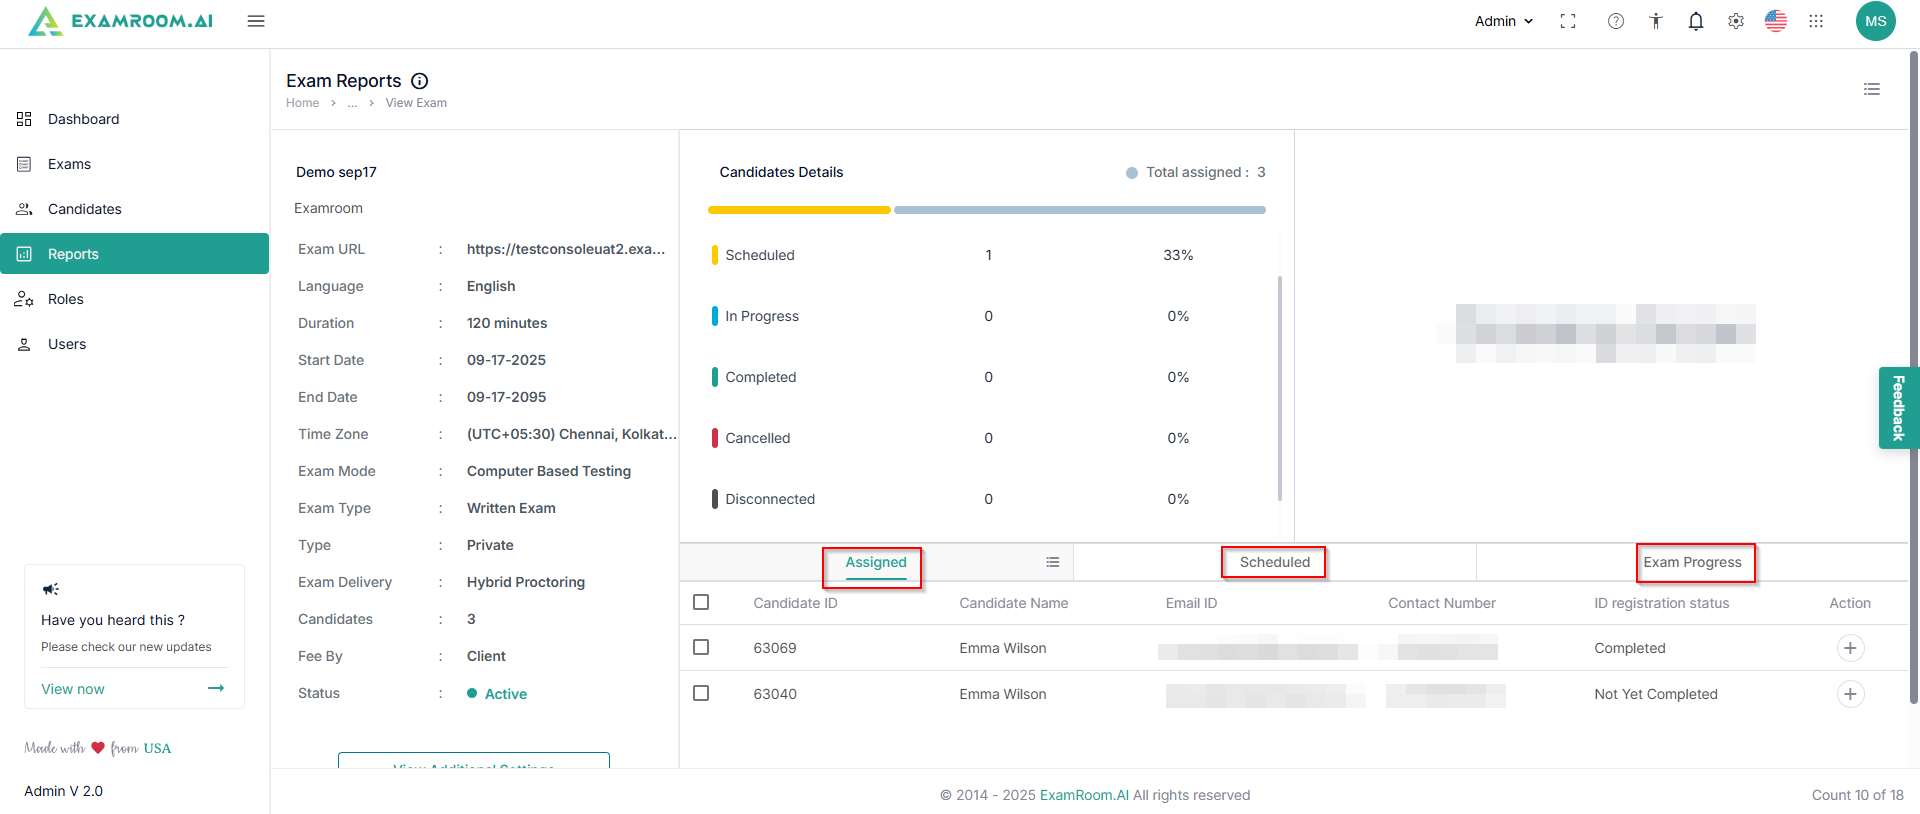
Click Exams under the reports screen to access exam-wise reports.
You can utilize CustomizeDisplay to view the required information columns under exam reports.
The reports based on the exam have the following details, which can be customized to display the desired information.
ExamName: Name of the exam
ExamID: Unique ID of the exam
ExamStartDate: Date of start of exam (Exam Link Activation)
ExamEndDate: Date of end of exam (Exam Link Deactivation)
Status: Current status of the exam
Schedule: It is the ratio of exams scheduled by candidates to the total assigned candidates
YettoSchedule: It is the ratio of exams that are yet to be scheduled by candidates to the total assigned candidates
Action: Available actions on the exam report
View: Click the view icon for a particular exam for a detailed view
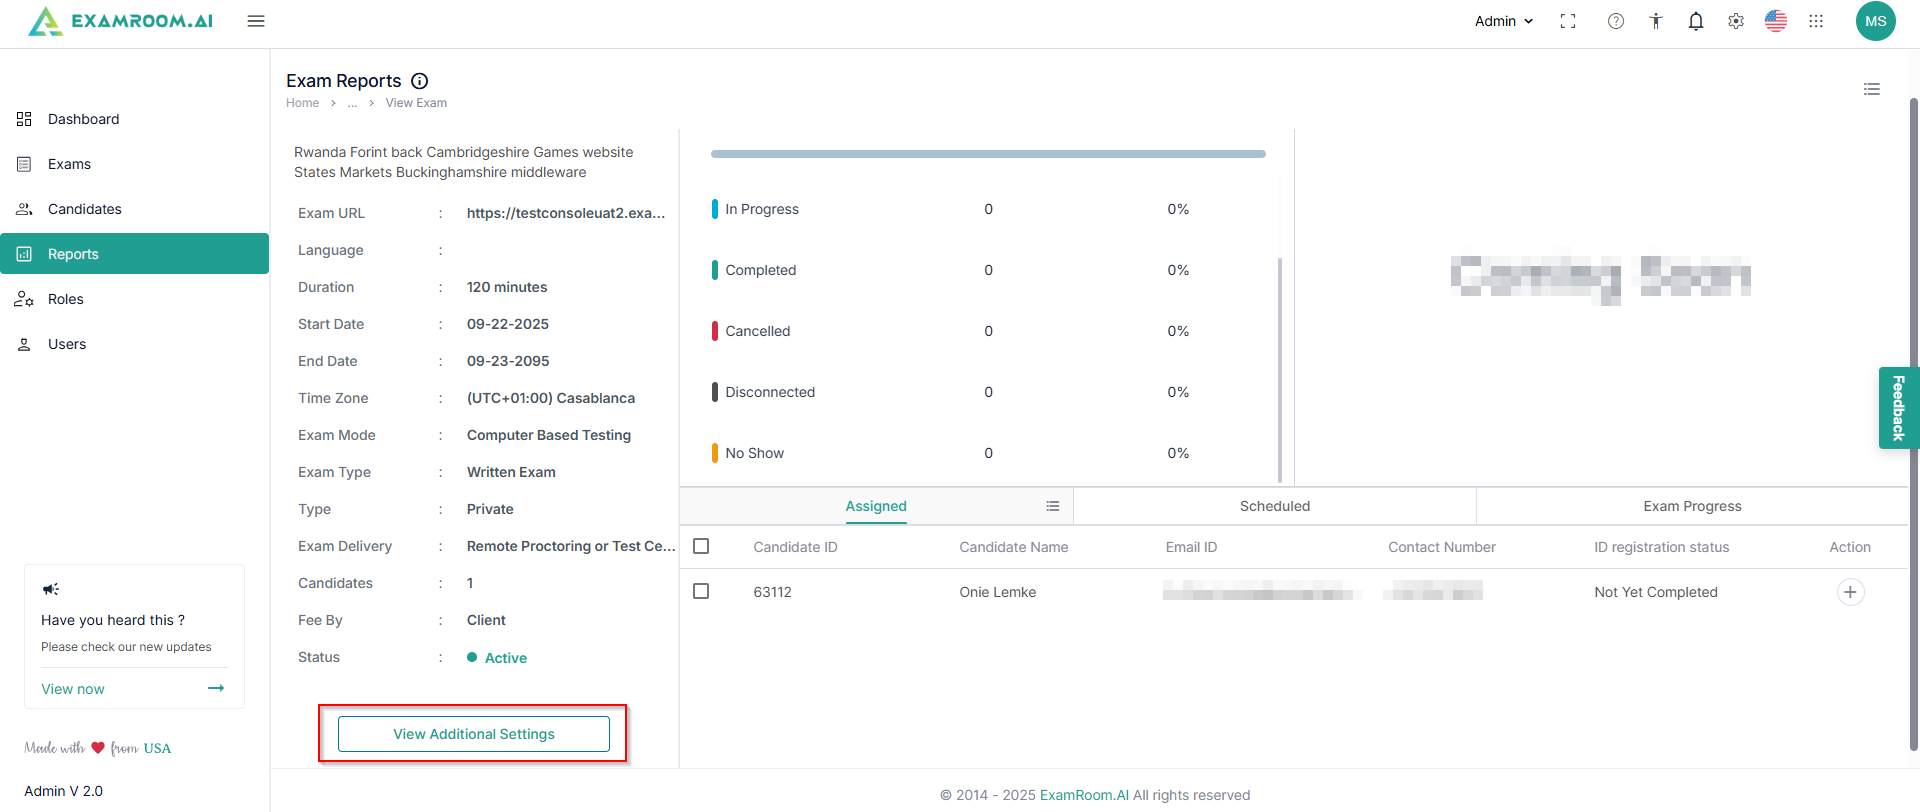
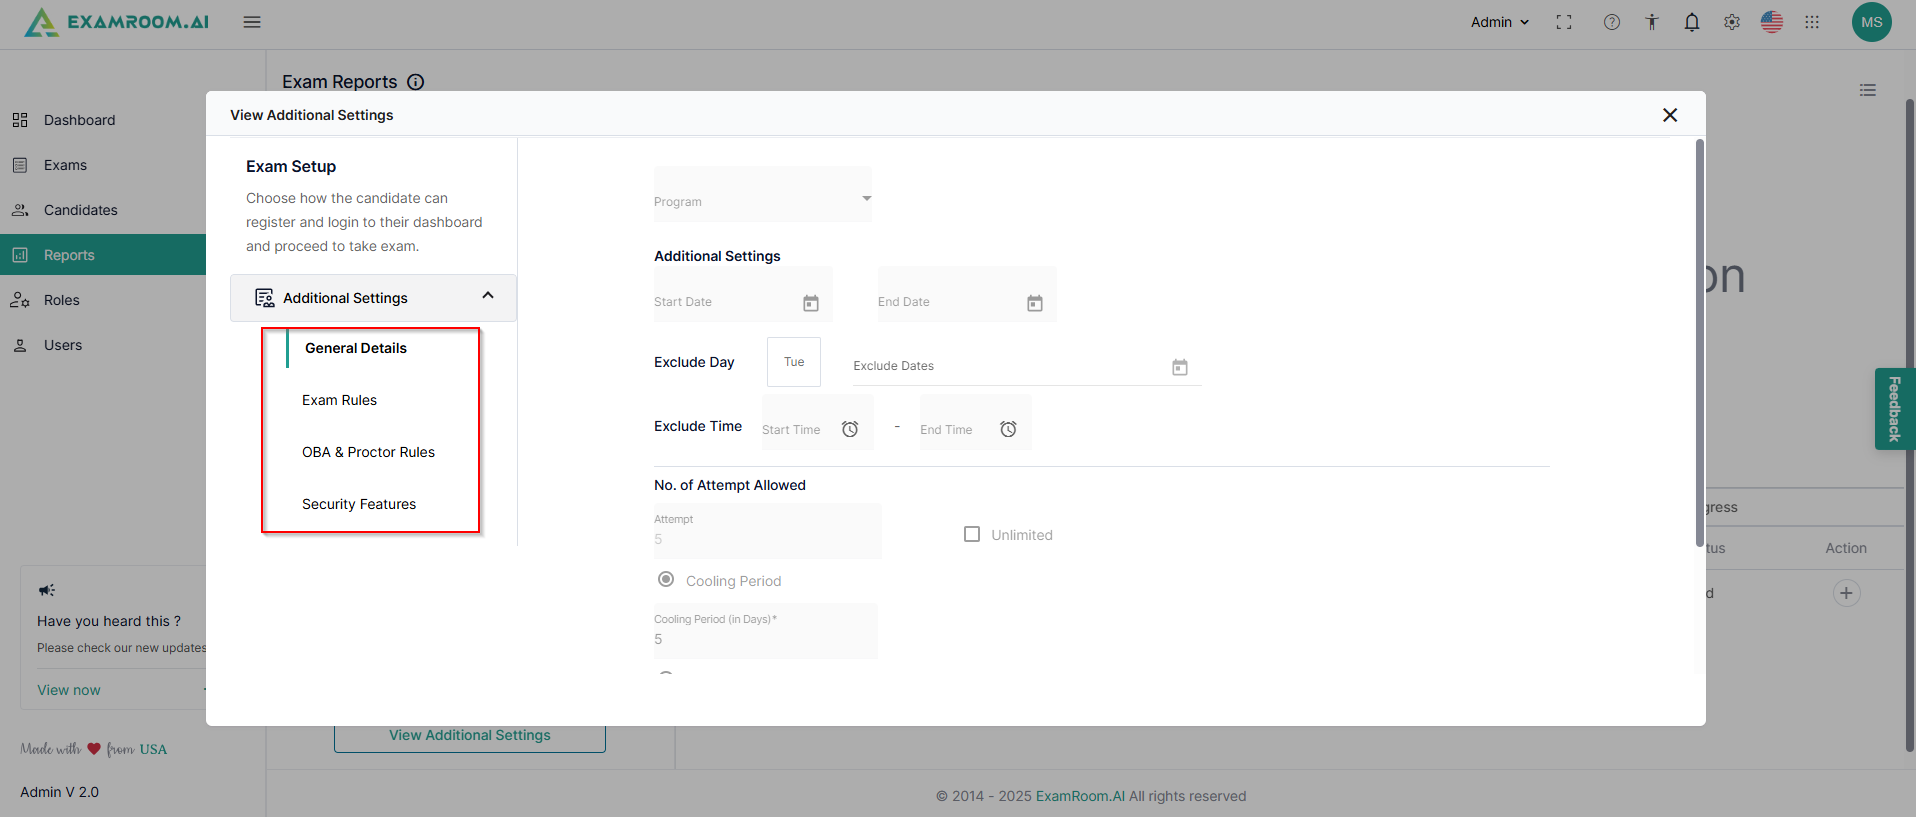
The left side of the screen has exam details available. Click ViewAdditionalSettings to check the added settings related to general details, exam rules, OBA, proctor rules, and security features.
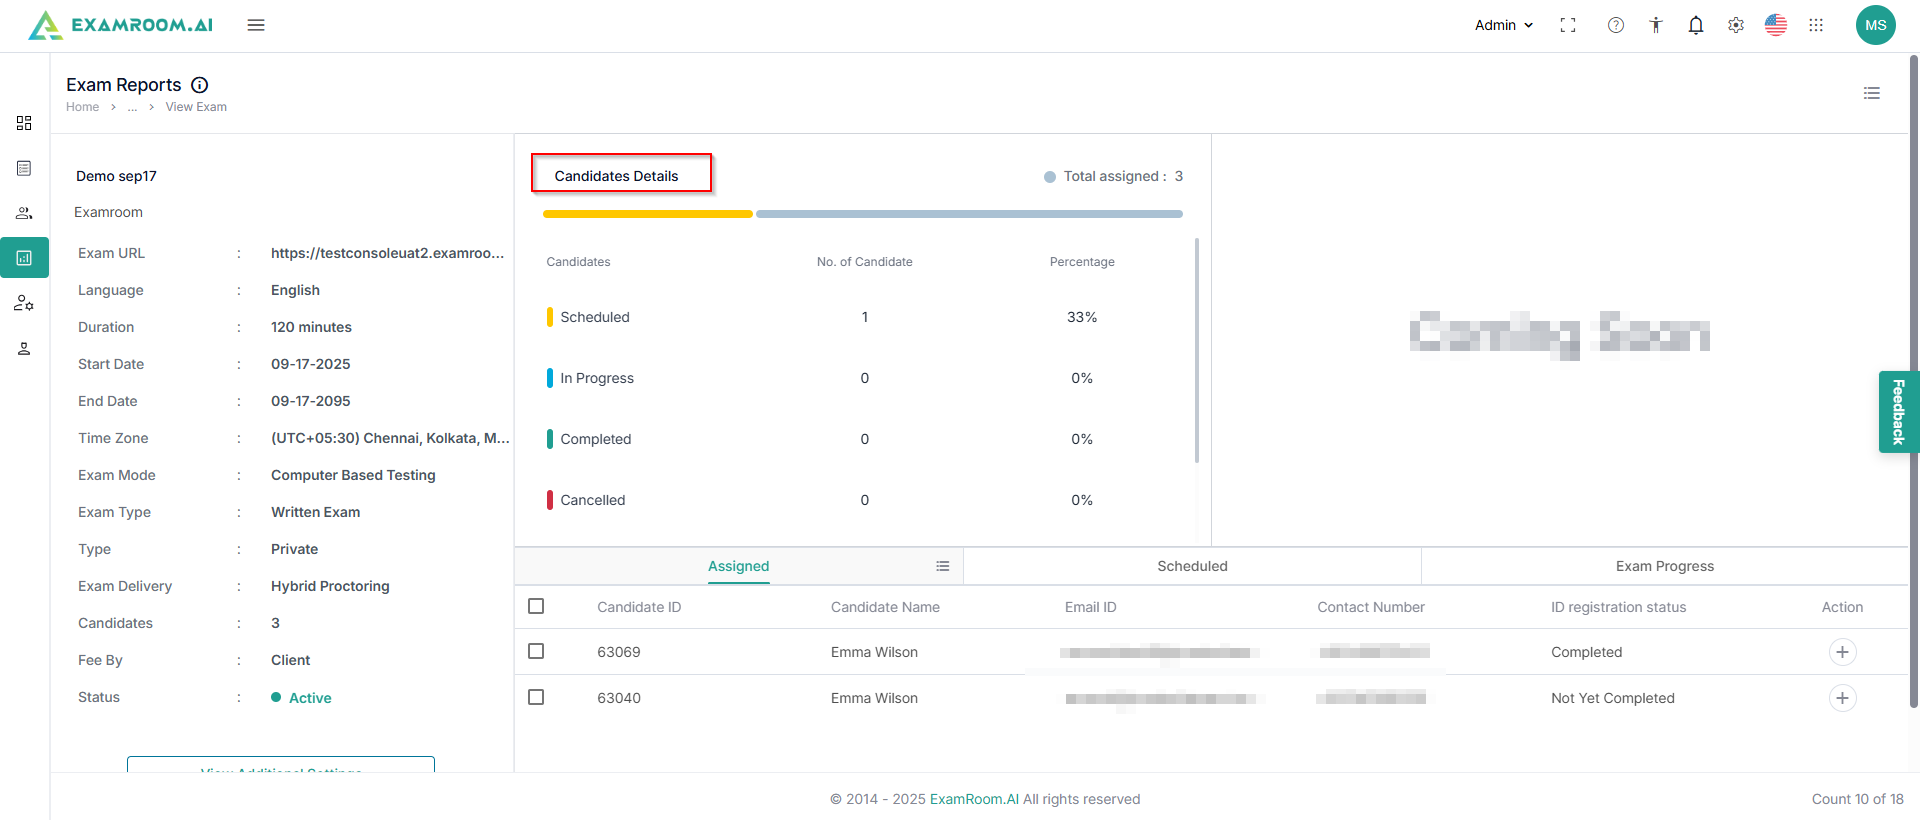
You can also check the candidate count details for the selected exam, including assigned, scheduled, in progress, completed, canceled, disconnected, and no shows.
You can also check the details of the candidates segregated into the assigned, scheduled, and exam progress categories according to their current exam status.
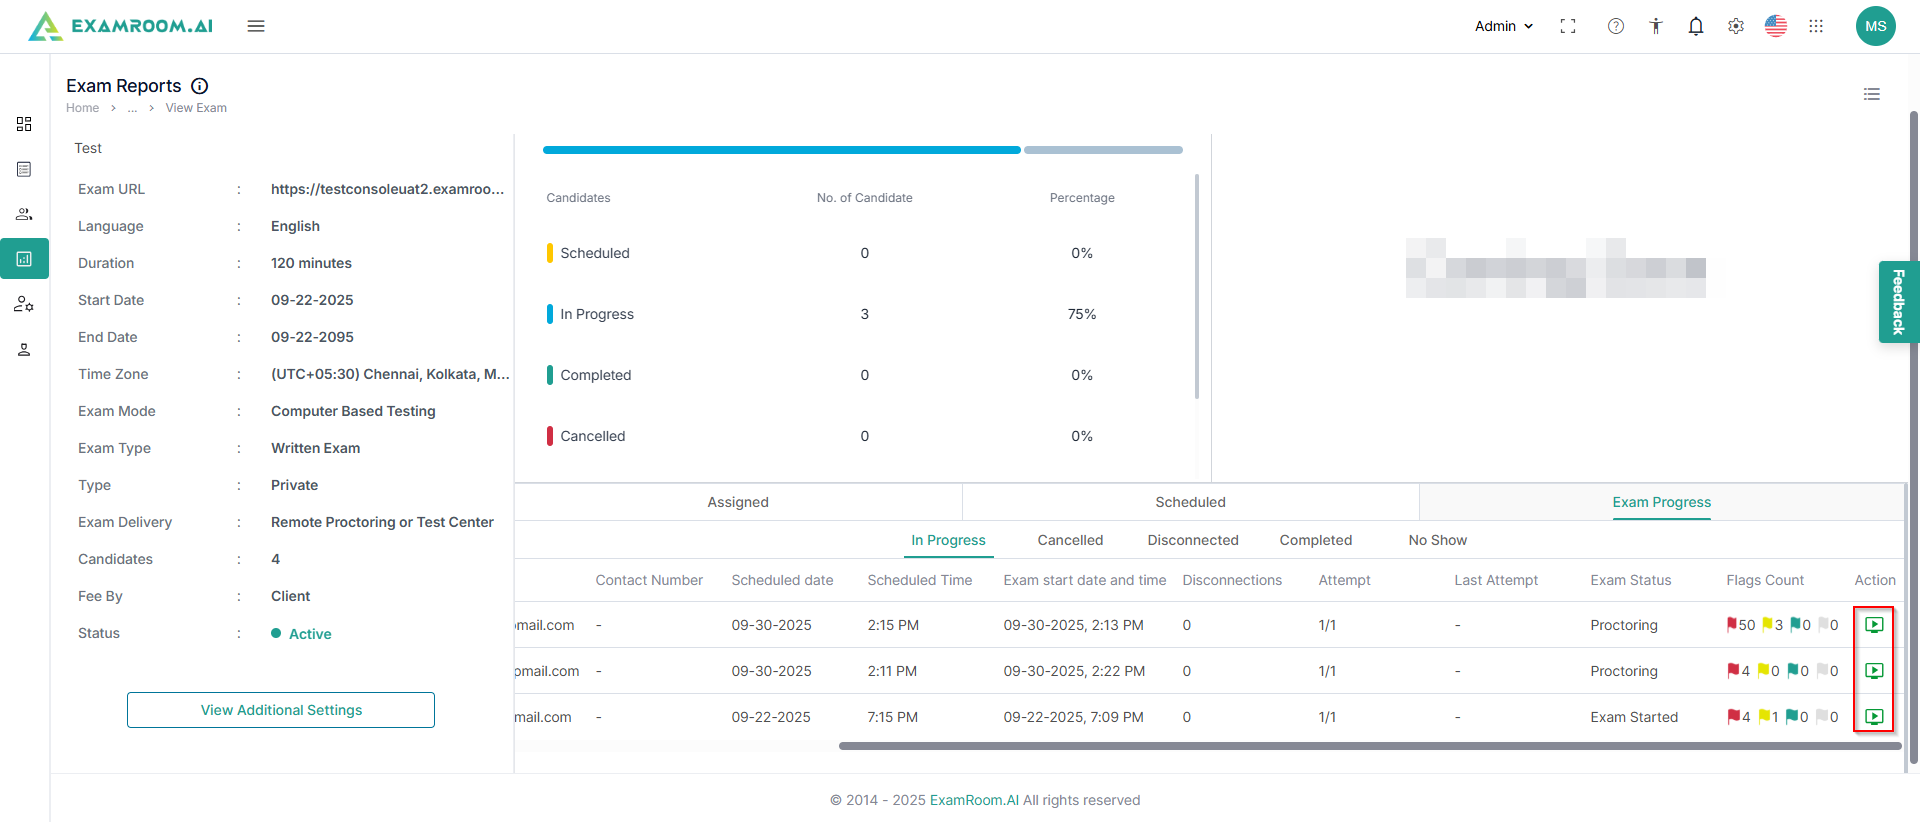
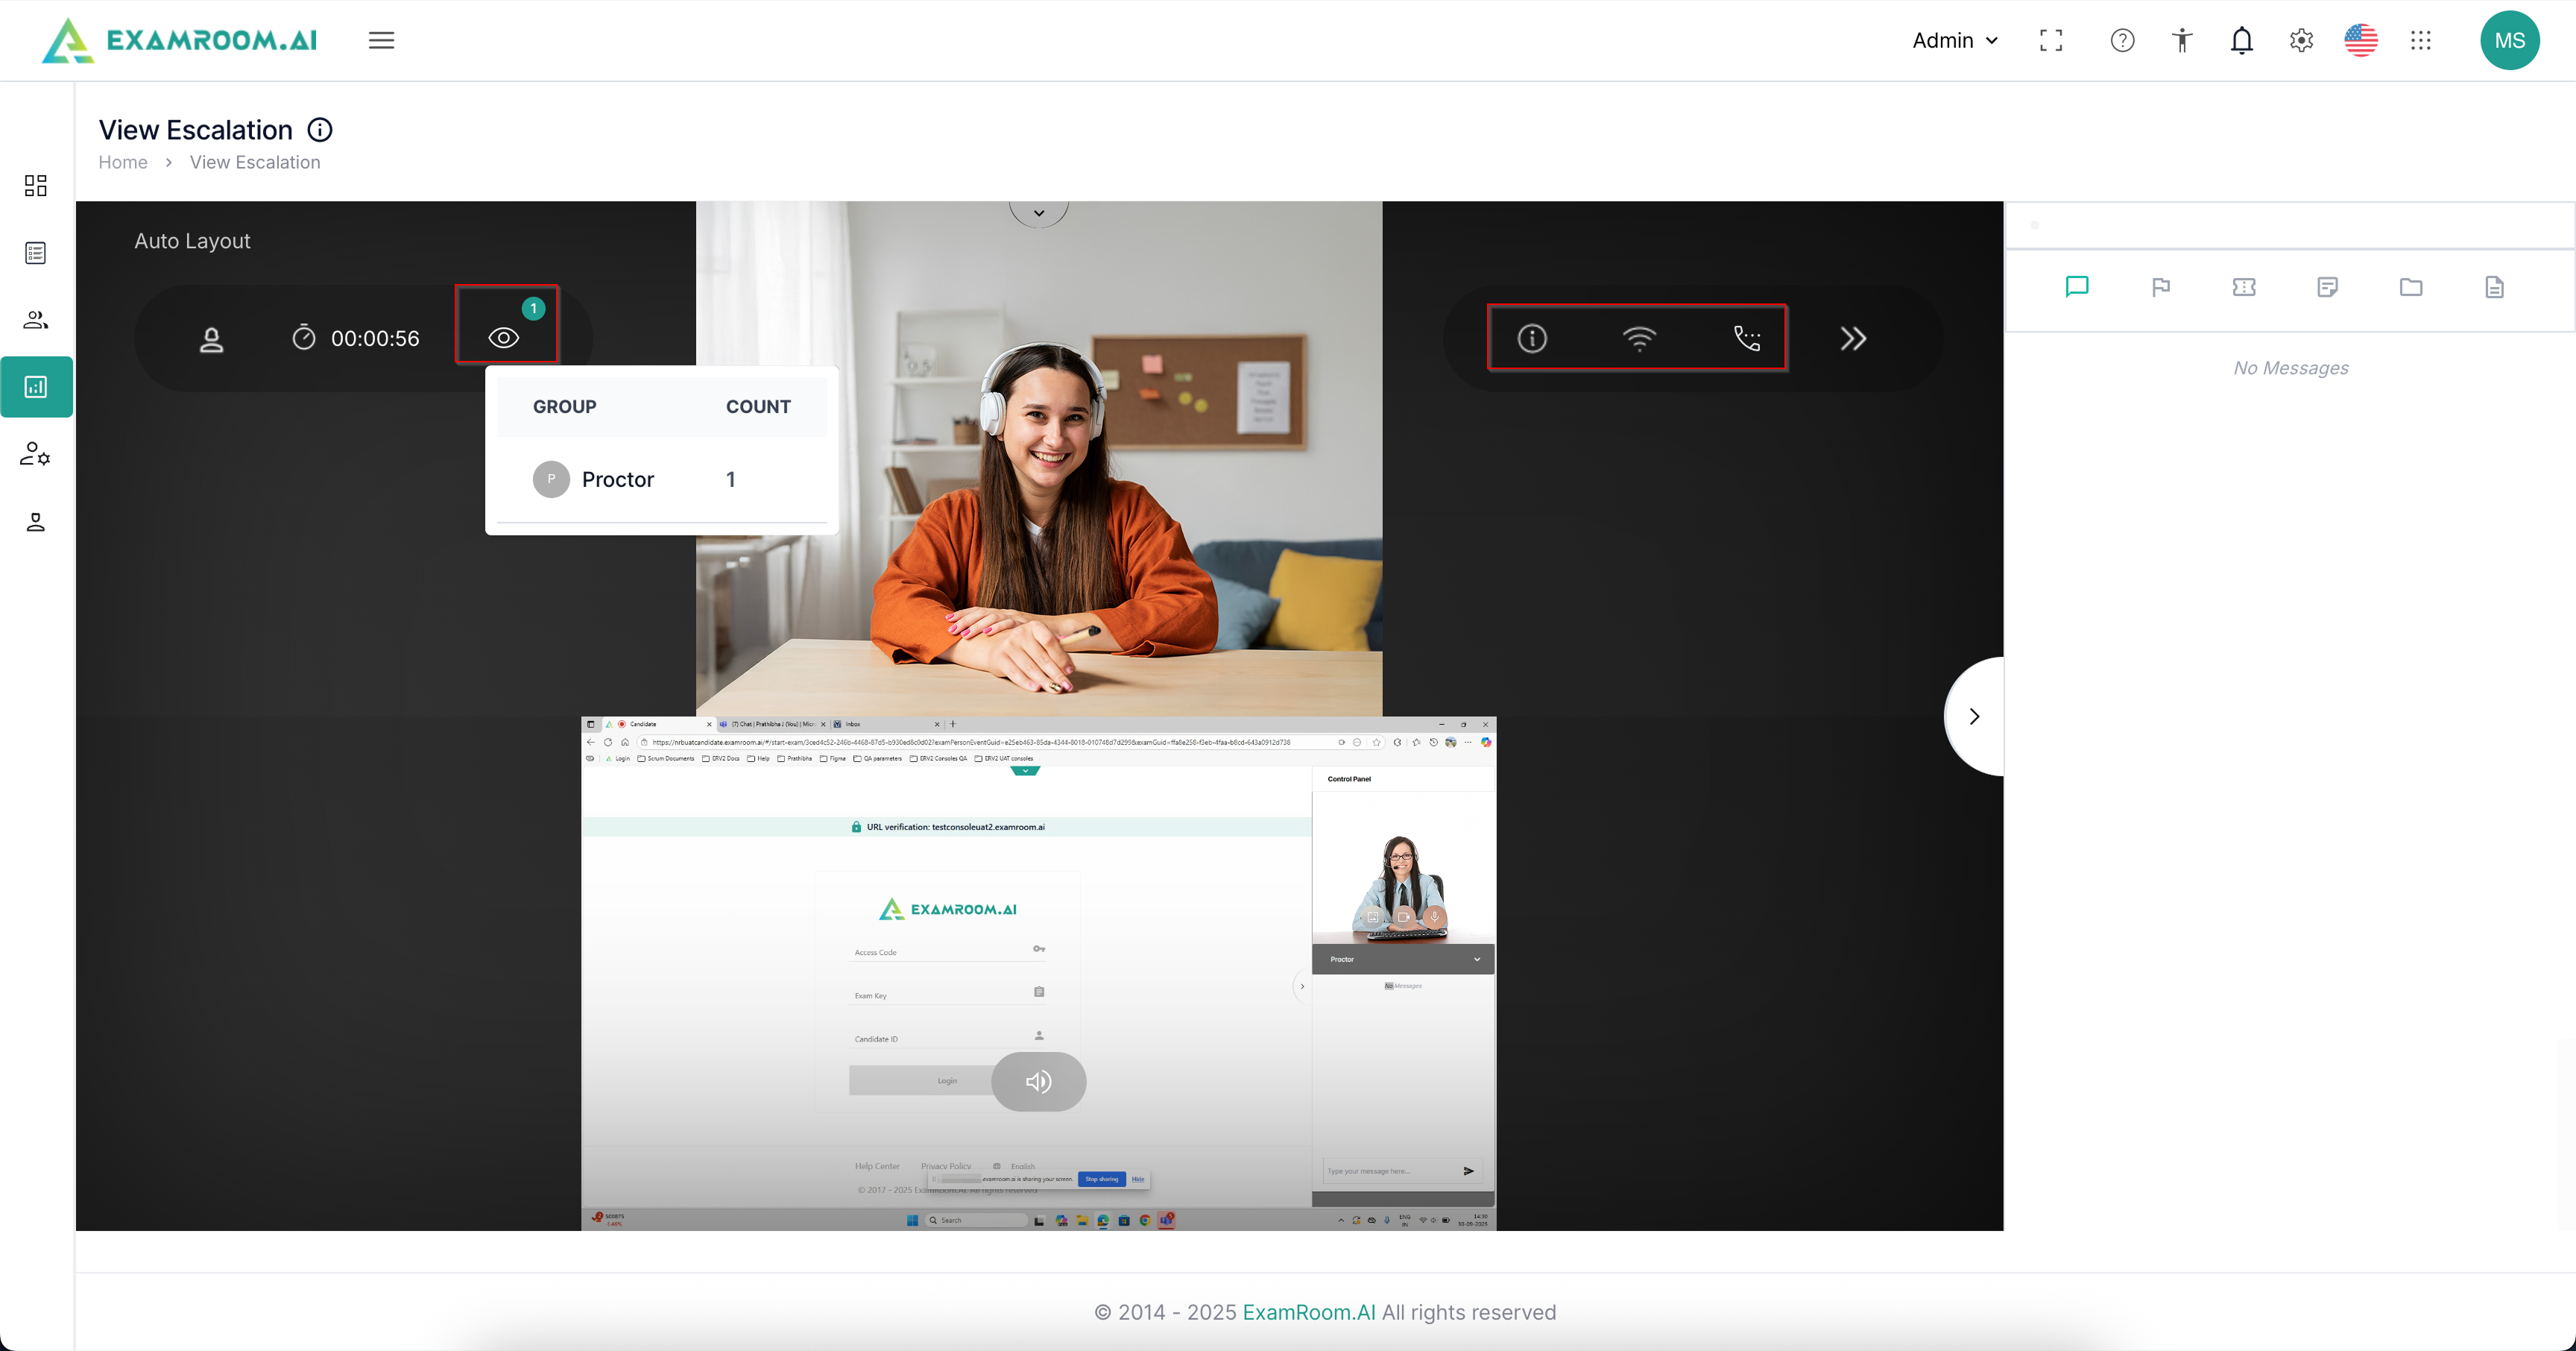
In the Exam Progress tab, there is a list of candidates who are attending a live exam. Select a particular candidate and, under action, click the Live icon to view their exam session live; this will not interrupt their testing.
Here, for example, a candidate is shown attending the exam, where you can see the live feed of the candidate attending the exam.
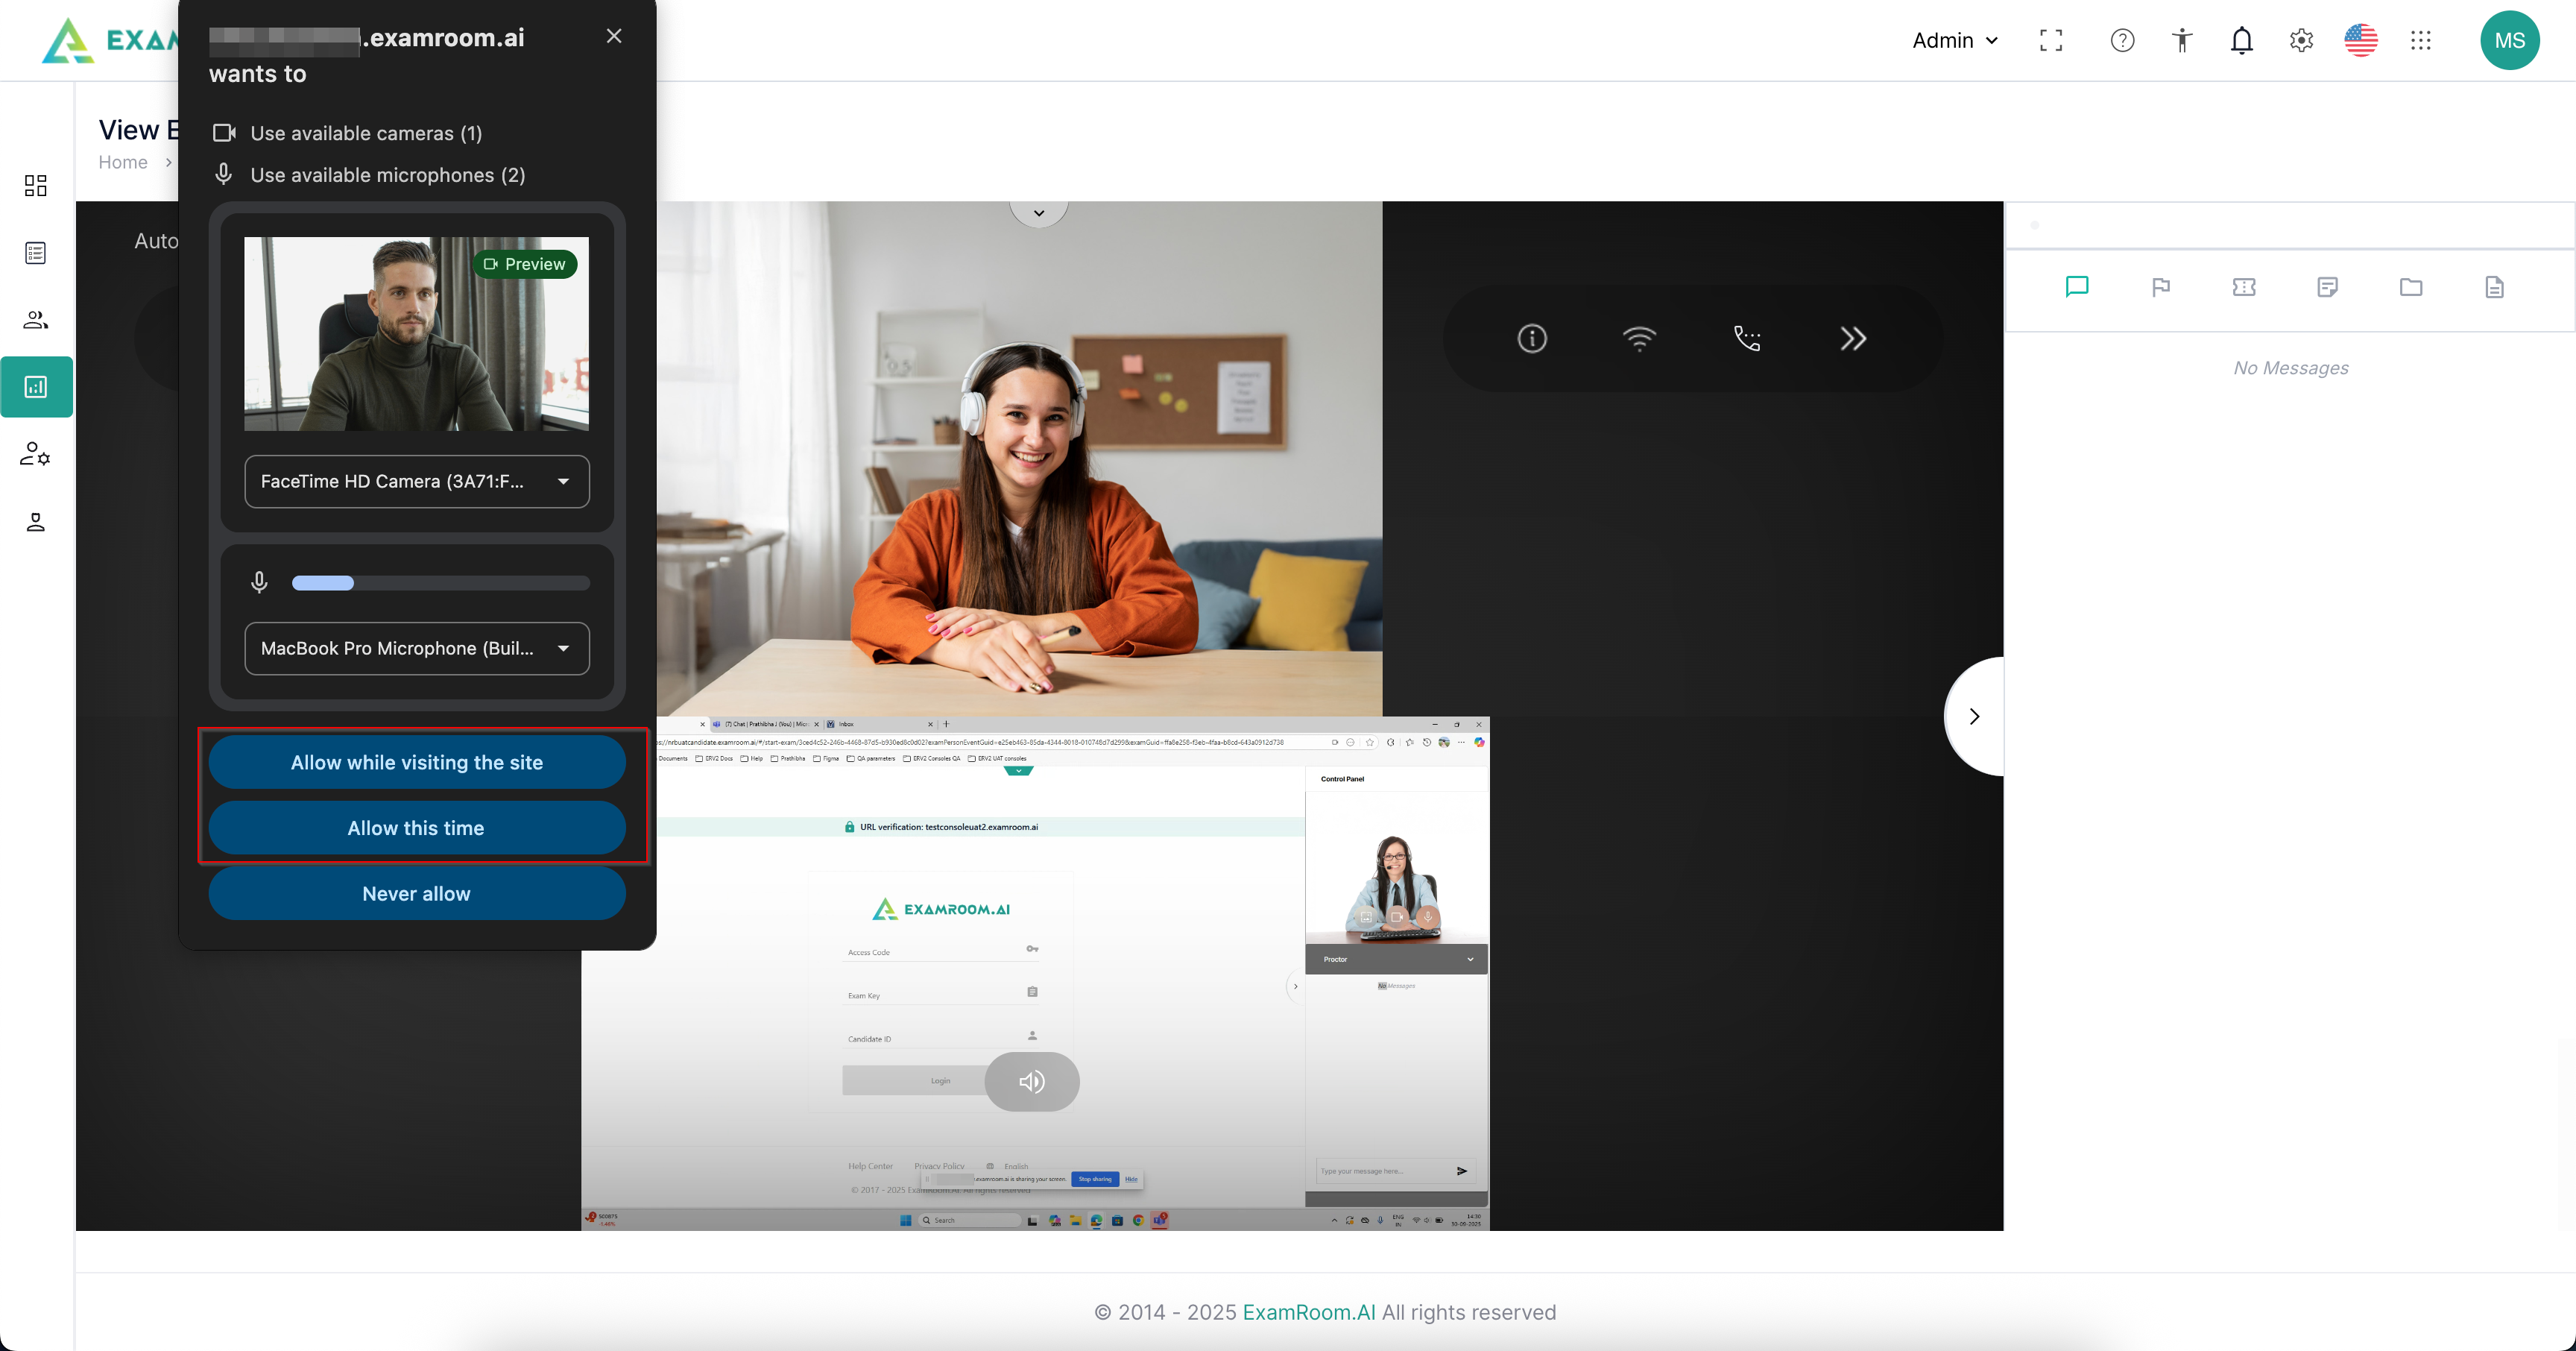
A pop-up appears to provide access to your mic and camera. Click Allow. You can also change your camera and microphone devices.
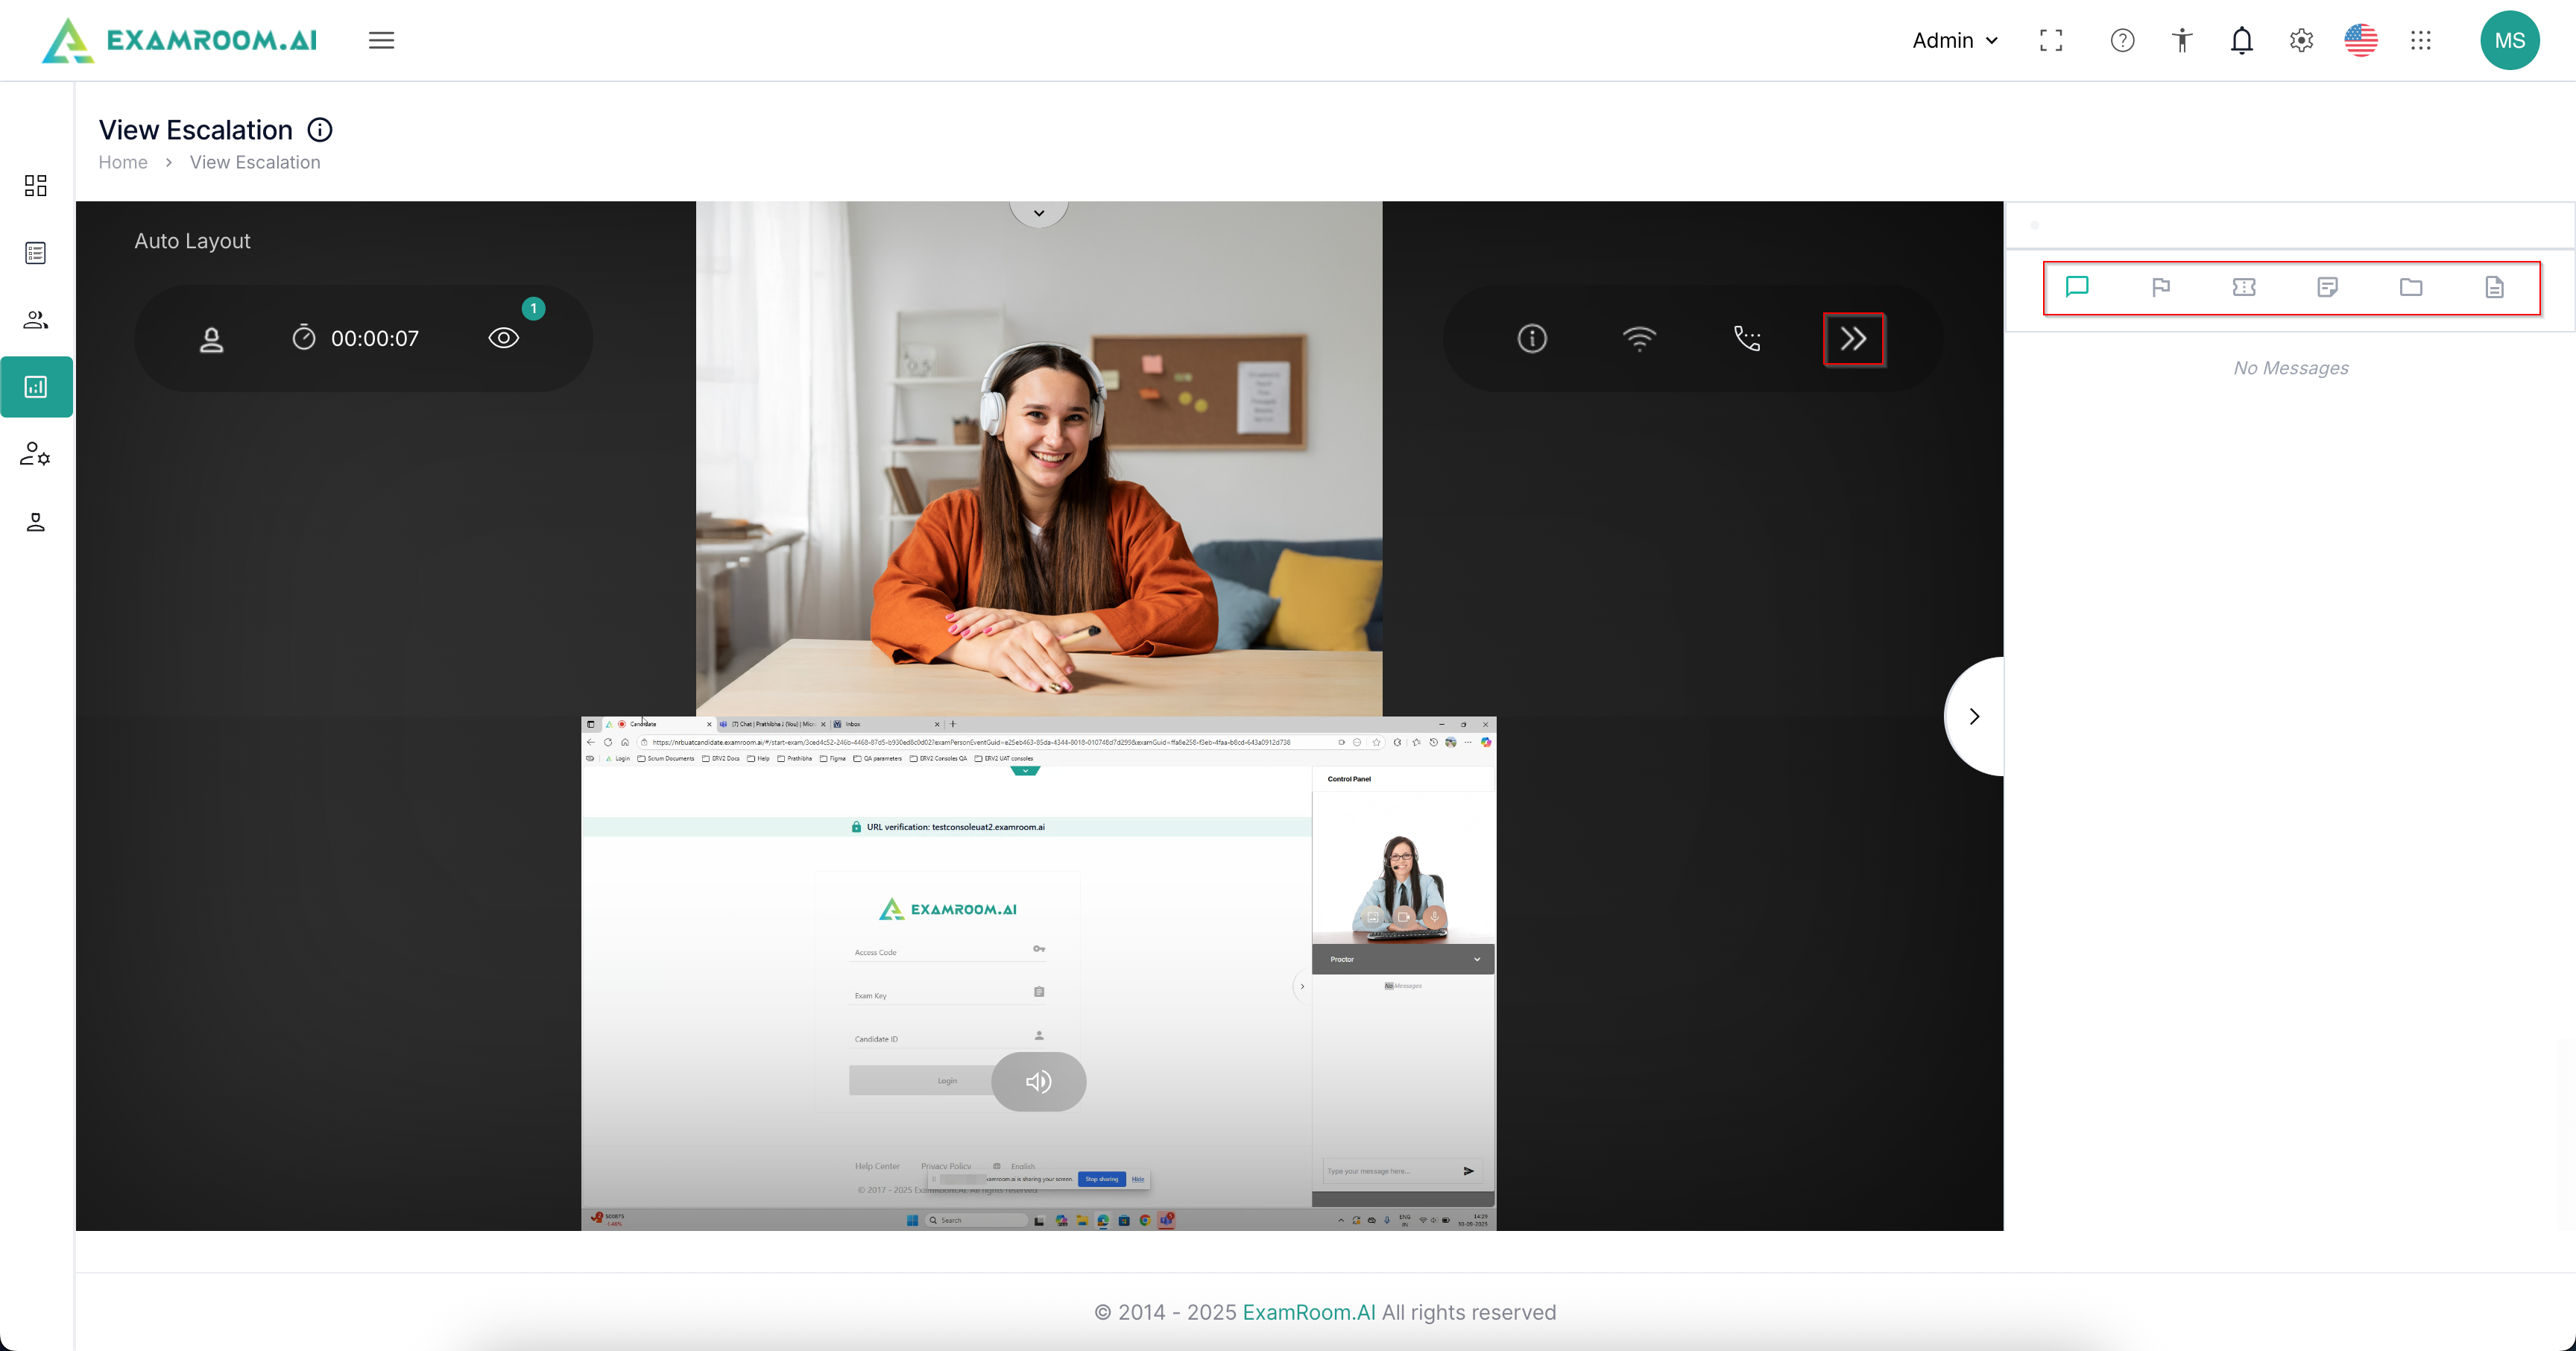
On the right side of the screen, you can open or close the sidebar using the indicated icon. In the sidebar, the following icons are available:
Chat: Click to check the chat between the agent and the candidate during the exam.
Flag: Click to check any flags raised during the exam session
Ticket: Click to check any tickets raised during the exam session
Note: Click to check any notes made during the exam session
Screenshot: Click to check screenshots captured during the exam session
Log: Click to check the activity log of the exam session
On the left of the screen, the agent's active time duration can be seen. Click the view icon to see the count and group of people watching the live session.
On the right side of the screen, click the info icon for examination information, the Wi-Fi icon to check the network, and the call icon to connect with the agent.